We are here to talk about OctoPrint for Resin 3D printer. Many people start 3D printing with FDM printers. When they need high quality surface and cost is not priority then they move to SLA printers.
Entry and mid level SLA market consists of LCD, DLP and Laser SLA 3D printer technology which later one is quite different and much less used.
SLA 3D printers used to be much more expensive compare to FDM which with release of LCD printers getting very close to FDM 3D printers.
| Comparison | FDM | LCD SLA | DLP / Laser |
| Surface Quality | Low | High | High |
| Material / Print Cost | Low | High | High |
| Printer Cost | Low | Low | High |
People in FDM world get used to work with OctoPrint when they want to make their printer works as standalone unit and easily controllable from web browser.
LCD SLA resin printer is quite different to FDM. On SLA you do not have much movement as FDM and you only have movement on Z axis. Then resin get solidified by display of layer, so instead of complex gcode generation, on resin printers layer image generation become much important and movement is much more simple.
NanoDLP Resin Printer Features
NanoDLP works as Resin 3D printer OctoPrint, with following differences:
- You do not need separate slicer as slicing process is not extensive as FDM work so could be done on Raspberry Pi.
- No standardization on SLA world, so it is much more difficult to setup NanoDLP on your printer compare to FDM. You need to enter lots of hardware details on NanoDLP.
- It is much more important to have standalone resin printer compare to FDM, as image display could get interrupted on your PC and force you to not use your PC for any other purpose.
- NanoDLP is free and not open source
- NanoDLP supports real-time processing and close loop feedbacks
3D Printer SLA slicer software for LCD / DLP 3D printers is one of the most important aspects of SLA 3D printing because it affects both quality and success of the prints.
What is the slicing process?
3D printer slicing is the process which converts 3D objects to specific data for printing slicing. 3D slicer operates this process. The data needed for each 3D printing technology is different. Here we will focus on slicer for LCD and DLP (SLA) type printers.
For so called resin SLA 3D printers, data needed for 3D printing process is a series of slices of an object (image frame) in different heights.
What is the slicing software?
Slicing usually is a multi stage process which could be carried out on CPU or GPU. Usually GPU slicers are much faster than CPU ones but also less flexible and could not run on many systems as CPU one.
Source data for slicing process is a 3D object in different formats, but right now most of the 3D printer users use STL and OBJ file formats. The STL file format contains the coordination of triangles tightly packed together. The slicing process could be done with different strategies and algorithms. Generally the below stages are carried out by 3D slicers:
- Read 3D objects into memory
- Cut / Slice 3D objects in different heights and generate polygon in a 2D surface
- Rasterize polygons
In stage 2, the object that is already sliced and some of the export formats such as SLC, could be exported.
Important aspects of a slicer software
Performance
Some of the source 3D files could be huge in size up to couple of gigabytes, specially the exports of cloud points from the 3D scanners (Dental market). Also the 3D editor that use nurbs instead of mesh (eg. Rhino) are used to have large export files.
Many slicers require more memory a few times more than actual STL file size to do processing. Also for CPU based slicers slicing process could even take up to hours to do.
There are many solutions such as meshlab to decrease size of STL by simplifying objects.
Features
Some slicers provide only basic functionalities but there are many features which are better to be handled on slicer level. Those features include:
- Surface improvements
- Polygon / Mesh correction and modifications
- Image processing
- Verification and overhang detection
Faulty Triangle Handling
Many programs exporting malfunctioned triangles. How resilient the slicer is, is a very important aspect of the slicer as it could cause faulty prints.
Some of the common issues on mesh level are:
- Shells
- Gap between triangles
- Wrong Normals
- Flipped Triangles
- Duplicate Triangles
- Orphaned Triangles
NanoDLP slicer includes repair functionality which could fix majority of the issues.
How NanoDLP SLA slicer works
NanoDLP slicer which is integrated in both NanoDLP and NanoSupport, is a CPU based slicer. Considering that the NanoDLP primary platform is Raspberry Pi, many technical choices are considered as Pi’s limitations.
The main stages of NanoDLP slicer are mentioned below:
- Loading 3D object
- Optimize input including deduplication
- Generate 3D preview on CPU
- Check matching triangles on each level (height)
- Cut them, and produce polygon
- Correct triangle
- Apply vector processes
- Pre-rasterization processes
- Rasterize
- Post-rasterization processes
- Run multi layer algorithms
- Save layers
- Verify output and island detection
NanoDLP SLA slicer performance
NanoDLP slicer performs very well. It’s main target platform is Raspberry Pi with very limited resources.
SLA Slicer Memory Usage
The memory that is needed to slice an STL file is around the same as an STL file size. So on 2GB memory you can slice 2GB STL file. Also NanoDLP supports multipass slicing which could slice an STL with any size, but it is super slow and not advised. In case of a very large STL file, it is better to use NanoSupport or NanoDLP Remote Slicing feature.
SLA Slicer Speed
NanoDLP utilizes all cores on your system. It is highly optimized for the speed.
On Skylake i7, slicing a 250MB STL file to a ZIP file that contains 256 PNG layers and 3D preview, takes 8.3s to finish. It includes all verification and statistic generation.
User time (seconds): 18.66
System time (seconds): 0.42
Percent of CPU this job got: 230%
Elapsed (wall clock) time (h:mm:ss or m:ss): 0:08.29
Average shared text size (kbytes): 0
Average unshared data size (kbytes): 0
Average stack size (kbytes): 0
Average total size (kbytes): 0
Maximum resident set size (kbytes): 272900
NanoDLP SLA slicer features
NanoDLP slicer supports many advanced slicing features and many of them are not available on the other slicers, such as:
- Anti-Aliasing
- 3D Anti-Aliasing
- Dimming
- Lens Distortion Correction
- Multi-cure
- Mask
- Island detection and layer verification
- Slicer level hollowing
With the new board you can easily upgrade your existing 3D printer with help of NanoDLP or make new 3D printers.
New NanoDLP controller board targeting LCD 3D printers. It comes with + 3.5″ HMI + 8GB preloaded MicroSD + Trinamic Driver. For more details on the board visit NanoDLP Controller Board page.
You can purchase NanoDLP Controller Board from Ali Express.


Changes and new features on this release includes:
- New auto-support algorithm
- Handle to hide/show left tools
- Optimize signal emission to update guide helper arrows
- Highlight on hover
- Various UI fixes like positions
- Fix UI input at launch
- Fix Lowest density
- Fine tuning auto-support
To download it use visit NanoSupport Download page.
If you do not want to waste your time printing the same object over and over again to get perfect print, try this new feature which available on the latest beta.
Using the new feature you can choose multiple cure times for the same object during plate upload and with single print you can get multiple copy of the same object with different cure times.
Whole print will takes as much as time required for the single plate using highest chosen cure time.
What is/are the reason(s) to use it?
Try different cure times very quickly and calibrate cure times.
How to use it?
- Go to
Plates Page - Click on
advancedbutton - Fill
Multiple Printinput
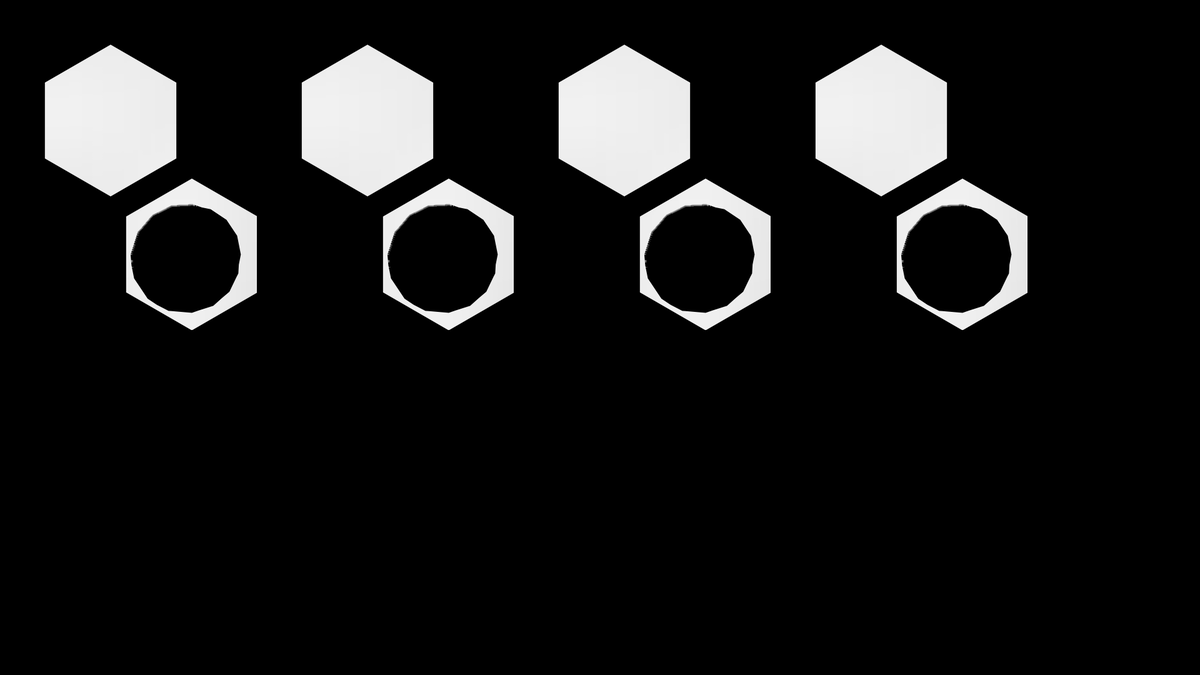
It is a technique to smooth those lines which look like the stair steps. Applying this effect will attenuate the lineament of jaggies.
What is/are the reason(s) to use it?
Jagged edges occur due to undersampling. The cause of undersampling is because of having low resolution of the printer or loss of information in the picture. Enabling Anti-aliasing will solve this problem and smoothen transition between different layers.
How to use it?
- Go to
Resin Profile - Click on
editbutton of your desired profile - Select
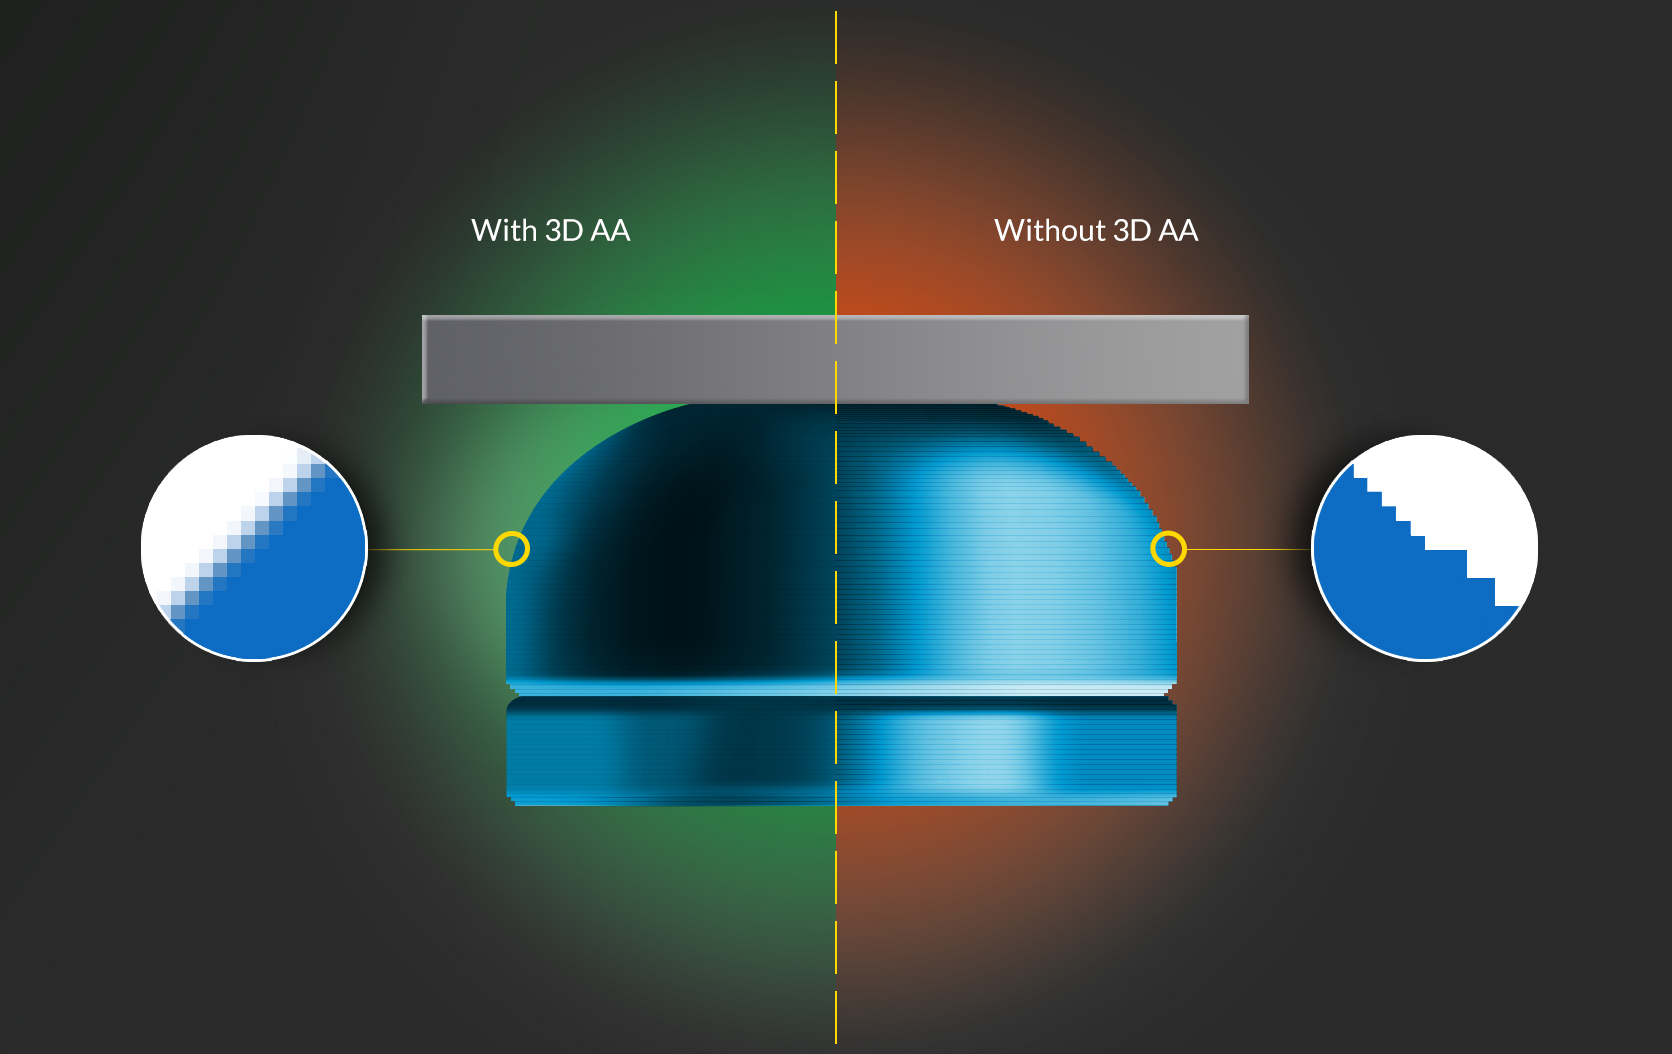
Advancedfrom theSetup Modemenu - By looking at
Slicer Optioncategory, you candisable/enablethe3D Anti-aliasingas well asAnti-aliasing. It is worth mentioning that it is highly recommended to make this feature asenabled.
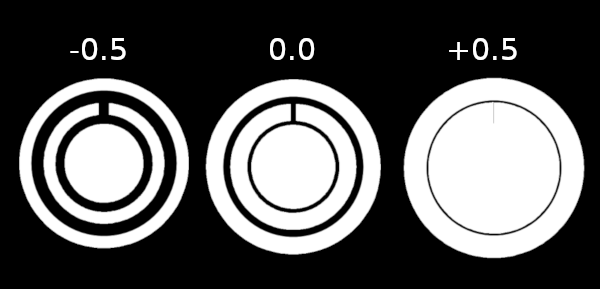
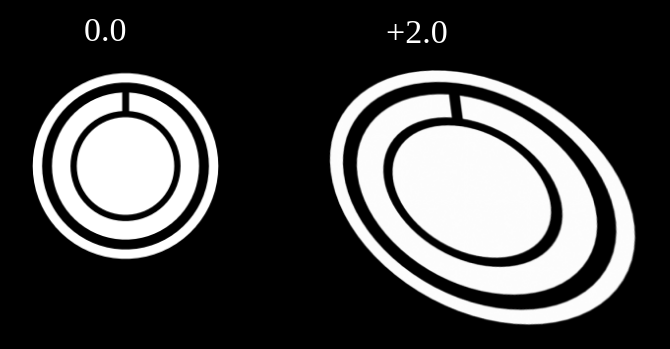
Erode and dilate reduce or expand the volume of an object by scaling the coordinates.
Advantages of this feature

Sometimes when printing without a raft, you may notice the elephant’s foot. This means the first layer is slightly larger than the rest due to a higher cure time.
While printing objects for practical applications, it can pose a large problem due to physical properties of resin such as shrinkage after it becomes solid. By using this feature, you can resolve the issue.
Keep in mind the positive value represents the Dilate Areas and Erode Areas is defined by negative value.
It is defined to fix the barrel factor which is caused by a DLP projector lens.
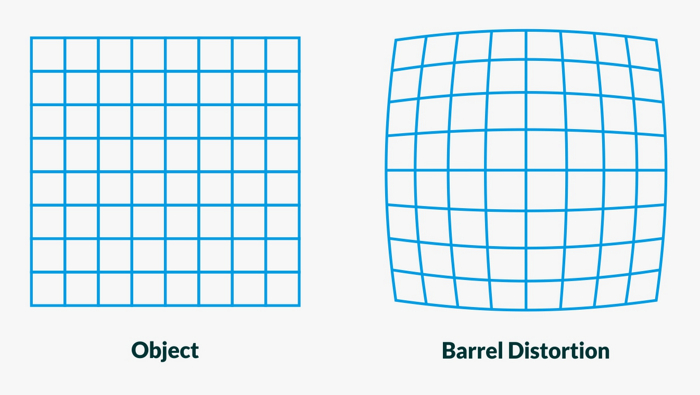
What is/are the reason(s) to use it?
By modifying the number, you can fix the lens distortion.
You can find more about the lens distortion here.
Pixel Dimming ensure the highest print quality along with an easy setup experience. This feature would have following effects by dimming the pixels:
- Prevents over-cure
- Preserves details
- Makes it possible to use one profile/cure time for different pieces with different thicknesses
- Increases the PDMS life time
What is/are the reason(s) to use it?
Pixel Dimming somehow is a necessity on large, solid parts. The larger the area being cured for any
particular layer, the more of a runaway cure you will experience. That is why, the layer over cures
despite all attempts to prevent it through adjusting cure times. But by enabling Pixel Dimming, you can
fix it quite easily.
How to use it?
- Negative through
Resin Profiles>Edit Profile - On the first row, choose
Advancedby selectingSetup Mode - By looking at the
Pixel Dimmingsection, you can select your preferredDimming Type.
Recommended Settings for FEP
- Dimming Type
- Checkerboard
- Dimming Amount
- 20%
- Wall Around Dimmed Area in Pixels
- 3 – Depends on x/y resolution
- Skip Layers
- 40 – To have stronger support structure, you can turn off dimming for some number of layers
Recommended Settings for PDMS
- Dimming Type
- Checkerboard
- Dimming Amount
- 35%
- Wall Around Dimmed Area in Pixels
- 3 – Depends on x/y resolution
- Skip Layers
- 5